Monday, March 24, 2014

TIE THE SEASON

This past Christmas I decided to make homemade gifts for my family. I wanted to give gifts to my parents and my siblings draw names and I got Tiff and Alex. So I chose to make Tiff and my mom skirts and Alex and my dad neck ties for church. So Tis the season, or Tie the season I don't know you tell me... Haha sorry I had to throw a dad joke in there since Corey G. is apart of this post. 

I'm sure there's a simpler way to make ties but I just got a tie and copied it and kind of made up my own way to make these!


I started with Alex's and the first one took me awhile to figure out but the next one was easier. It was hard for me to find silky fabric the was masculine and not so feminine so they ended up with pretty bright ties. But next time I want to try cotton fabrics I bet there would be more boy options. 


Basically to make them I had one long piece of fabric and two smaller pieces for the ends. I placed them on top of each other on the ends with the front side inward and sewed the angle on the bottom of the it. Then I turned it inside out and it was a triangle shape with a seam at the bottom. Then folded the side edges under twice and hot glued them down. Its really simple as long as you measure it to a real tie correctly!


It was definitely a first experiment and I learned a lot for next time about improvements that can be made, but I was pretty happy with the outcome! 


Look at these handsome guys! They are always such good sports to wear my gifts :)


Wednesday, December 4, 2013

SEAMS SIMPLE

This project may "seam" simple... Well that's because it is! Haha sometimes these are the only kinds of projects people have time for.

Sooo I found a dress on sale at H&M... emerald green, sweater material, long and cozy! 


But then I tried it on I realized it was completely see through.. yikes


But then on the next rack I found a little green dress on sale too... light bulb! haha


I bought both dresses, they were on sale plus I had a 25% card so that was awesome. Then I altered the green dress to fit tighter because I bought an XL so it would be longer. Then cut and sewed the sleeves to a tank top to match the should seem of the sweater dress. And cut and sewed the back lower because the sweater dress has a lower back.


So the green dress in now a slip underneath. It was simple easy and quick but thats the kind of project that is possible to do on a more daily basis. I love my new green cozy dress!


Annnd I found out that it also doubles as a great pilgrim dress...


My friends had a Frenzgiving party with costumes and a thanksgiving feast!


I hope your thanksgiving was as good as mine :)


Thursday, October 31, 2013

KNIT TO BRAG


When I was about 10 years old my mom taught me how to crochet yarn around the edge of blankets. It took me quite awhile to do my first blanket but after that it was much easier. Not to brag... or "Knit to brag," but I'm probably that fastest crochet-er around town. (Women over 70 don't count, those ladies are quick) Haha this didn't come to me without a lot of practice though! Making a blanket like this became one of my favorite gifts because everyone likes blankets and it means a little more to make it than to just buy it. 


All you do is: Buy 2 yards of fleece and matching yarn. Poke holes 1 to 2 inches apart, We bought a leather poker that works great! And then crochet the edges... obviously I guess.


By now i have probably made over 10 blankets like this for family members, friends, teachers, church leaders... but don't be fooled I only make them for special people :)

Here are three examples I could round up for this post...

Tiffany: I made this for my cute sister Tiffany for Christmas one year. It is one of my favorites because the fleece has yarn sewn on in flower shapes and the yarn I used for the edge matched it almost exactly. 

Tasha: I made this for my other cute sister for Christmas as well. I like this one because the fleece is really soft and I liked how the yarn was multicolored but still matched well. 

Jenny: This was for my wonderful roommate and friend for her birthday. This was actually my most recent. I hadn't done it for quite awhile, but it came back to me easily. I did this one all on my own no help from my mom to poke holes or start or end it, I was pretty happy about that. I think this one is really cute!

Tuesday, October 22, 2013

VINTAGE.. OR GRANDMA?

There's a fine line between vintage style and grandma status... When I picked out this dress I was going for a vintage kind of thing but I think it ended up too far on the grandma side, but you can be the judge. As usual I was shoppin around at the D.I. when I found this dress, I thought it was cute because it was kinda mint green with pretty flowers...


So I tried it on and I liked how it fit for the most part. The only thing I didn't like was how tight fitted it was around my waist and it was an awkward length. Of course I bought it, I couldn't resist.


First things first, I took the shoulder pads out ASAP. Haha then to fix this dress I took out the middle section of the dress because the bottom the dress was wider and I wanted a more flowy dress instead of tight. This solved the fitting and length problem. With the middle section of fabric I used it to make a sash because I thought it needed a little extra detail. 


I like this dress but it hasn't been my favorite project outcome. I wish I wouldn't have made the dress so loose so high on my body and I wish that I would have redone the sleeves because they are a little to grandma-ish... but live and learn :)


So vingtage? Or grandma? You tell me.


Monday, September 30, 2013

YARNPITS

Hahaha admit you're laughing at this title because I am...

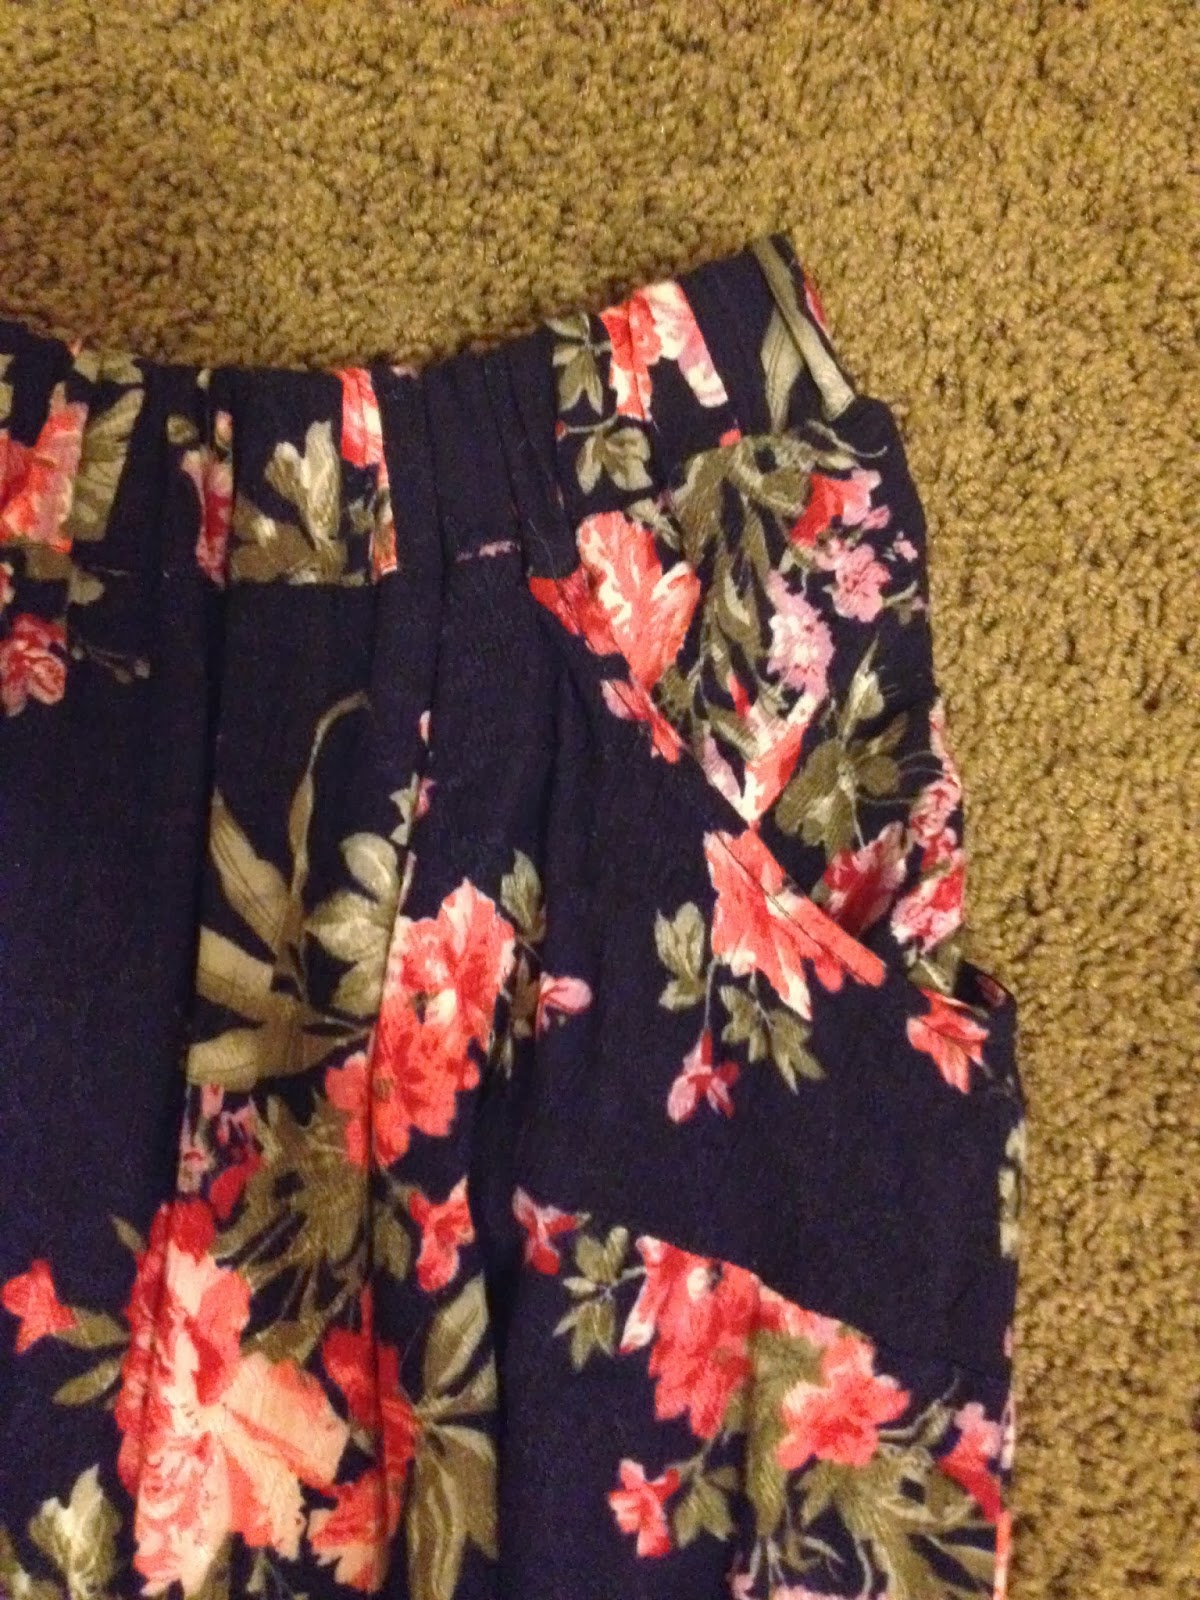
So it was just another day at the D.I. when I came upon the perfect grandma mumu and matching jacket! A mumu in my words means a giant shapeless dress grandmas wear for pajamas or church dress... they are apparently very versatile! I didn't take a before picture but this dress is similar to what it looked like.


I thought this dress would make a perfect maxi skirt! It was a nice cotton fabric that was navy with pink flowers. I bought it but there was one problem, it wasn't long enough if I cut it under the armpits. So I used the armpit holes as pockets. I cut under the neck but above the armpits and used the jacket material for the waistband and pocket insides. That is where the title came from haha and i just threw the yarn part in because it is somewhat sewing related!


I also used the buttons on the jacks to add some detailing to the back of the dress on by the slit.


This project was really easy and I have worn it a lot. I love a skirt with pockets :)


Saturday, September 7, 2013

THRIFT SHOPPIN

One of my favorite stores is the D.I. Yes it has a reputation having pretty gnarly stuff... But that just makes it all that much better when you find a gem that you love! Well I was lucky enough to find this white dress one day. It looked pretty bad but I saw so much potential in it because I loved the fabric pattern and feel.


Little did I know I was in for a lot of work to fix it up... Heres how it went:
  • First i took the sides in so that the waist fit well around me.
  • Cut the neck line- this was the hardest part. I wanted a nice clean scoop neck but with that fabric I couldn't just do a single stitch I had to sew it to another piece of fabric and fold it over so there weren't stitches showing.
  • in the process of the neckline I took out the zipper to make the back of the neck into a low V.
  • Resewed the zipper in.
  • took in the sleeves to fit tighter
  • cut the bottom of the dress. This was the second hardest part because I reallllllly wanted to make it a high-low dress (short in the front, long in the back... like a mullet ;) Haha to do this I traced a hula hoop to cut the dress round.
  • With some extra fabric my mom helped me make a ruffle for the bottom. I could not do this without her! shes sews a big stitch through the ruffle then moves the fabric around to make an even ruffle. Then she sewed the ruffle to the bottom of the dress.


This dress had an extreme make over that took for.ev.er! But I ended up loving it :) This is one thing that I have made that I am pretty proud of because of how impossible it seemed at first and how much work went into it.

Monday, August 19, 2013

THE MASTER WEAVERS PLAN

When you don't understand why something is happening to you... this quote may help. It is one of my very favorites.

"My life has been a weaving
 between my God and me.
 I do not choose the colors,
 he worketh steadily.

 Often times he weaveth sorrow
 and I in foolish pride 
forget he sees the upper,
 and I the underside.

 Not til the loom is silent
 and the loom cease to fly
 will God unroll the canvas
 and explain the reasons why.

 The dark threads are as needful
 in the skillful weavers hands
 as the threads of gold and silver
 in the pattern he has planned." 

-Unknown author quoted by Elder Maxwell


I probably just like this quote because I'm a sewing nerd... Haha but I love the visual this story gives. It just makes me realize that there will be hard times but they are an important part to make us who we are and to have a successful life in the end. It always reminds me to keep faith because he knows what he is doing. :) 


These are photos of a beautiful cross stitch give to my mother by a close friend. I couldn't get a picture of the underside but I am sure it is not nearly as beautiful!

I'm a Mormon. If you'd like to learn more about my religion you can visit mormon.org :)